This information is from the German site Speeerschleuder.de. They have no English page, so I attempted to translate it myself.
I have not gotten their permission for this yet, but am trying to do so. The original page is here.
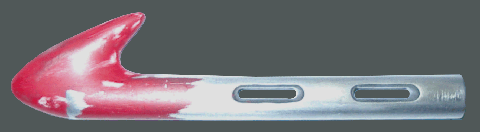
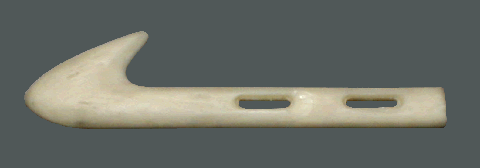
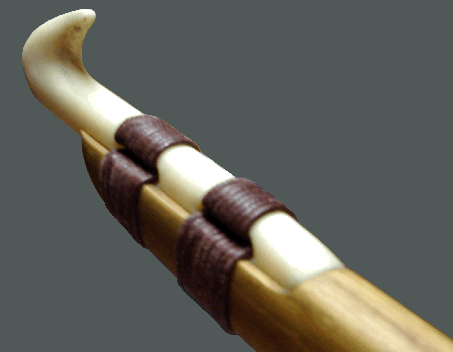
Speerschleuder with Attached Hook

The speerschleuder illustrated above consists of a shaft of white thorn wood with a separate hook made of synthetic resin. Usually the hooks are carved from horn or ivory, but since I don't have access to these materials and/or they are very expensive, I decided to make one out of synthetic resin instead. I realize that not many people have the means to make a hook by this method, but I would still like to show how it is done, since more hooks can be made whenever they are needed without any variations. The resin I used is normally found in professional construction (foundry) use. It is durable and flexible, and without adding any dye it reminds me of ivory, which is what I wanted.
|
|
First, a model must be made. The one I made consists of an aluminum shank and an upper hook formed out of model lacquer (which works like fine putty). The long holes are milled in.
|
|
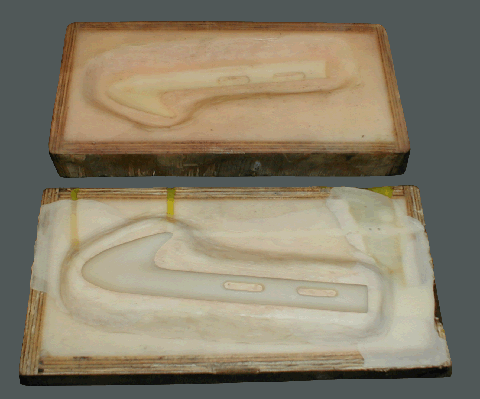
From this model, the first half of a negative is poured. The material for this could be gypsum, which is very inexpensive, but not very accurate or durable. Synthetic resin is much better for this.
After the first half hardens, the second half can be poured as well. After that hardens, the two halves are separated and your model is formed.
You will need to do some fine work on the mold to smooth out any rough spots, and small channels will need to be drilled so air can escape (in this case, I drilled through to the peg, with the fill hole at the end of the shank).
The mold is now ready for production. In the picture you can see a blank in the lower form which has already been poured (the yellow veins are Plastilline plugged air ducts from preliminary tests.)
|
|
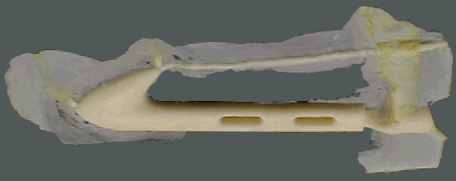
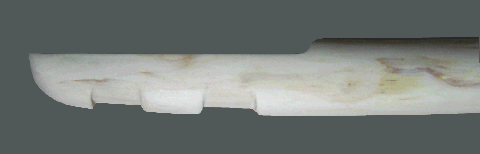
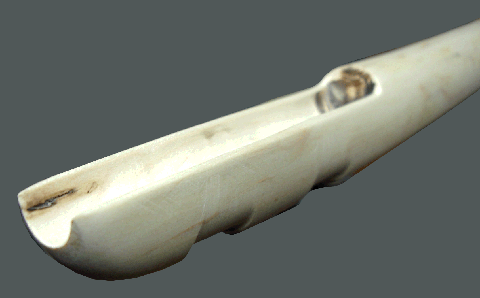
After 24 hours the hook can be removed from the mold. There will be a thin burr running around the hook where the molds were joined. You can see the fill hole at the end of the shank and the air escape hole leading from the peg.
|
|
The thin burr is simply snapped off and the fill plug is removed with a knife.
|
|
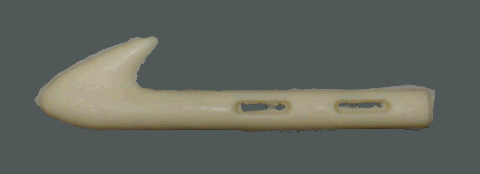
The remaining burr is scraped off with a knife blade and polished with fine emery paper. After a 'cure time' of two more days the hook is ready for use. For strength and stability, the cross section is a slight oval (14 mm high, 12 mm wide). The long holes are on the upper half of the shank so that it can sit deeper into the wooden shaft.
|
|
The receiving end of the wooden shaft is milled and shaped with a suitable tool. A Dremel works great. |
|
As you can see in this picture, I went down a few millimeters into the wood to allow the shank of the hook to lie deeper. I then made some shallow grooves across the bottom where the leather lacing will go to keep it from slipping.
|
|
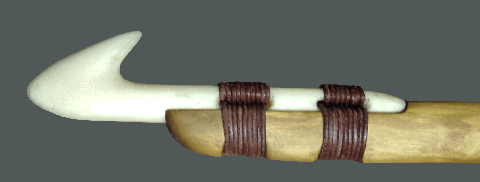
The bottom of the hook's shank was roughed up with a rasp and glued into place with two-part epoxy. This guarantees a firm and secure seal to the wood.
|
|
The lashing for the hook consists of two leather lashes, about 1/16" diameter and about 3 feet long. The leather I used for the handle was about 1/8" square by 6 feet long
|
Note: If you don't have the means to make a resin hook, one carved from hardwood (such as beech or maple) will also work. By using different woods, varying the attachment of the hook, and trying other changes, a very pleasant effect can be achieved. |